Dungeon Settlers Four Slots, One Expedition
No healer, no respawn, no excuses. Build a party that survives the portal home.
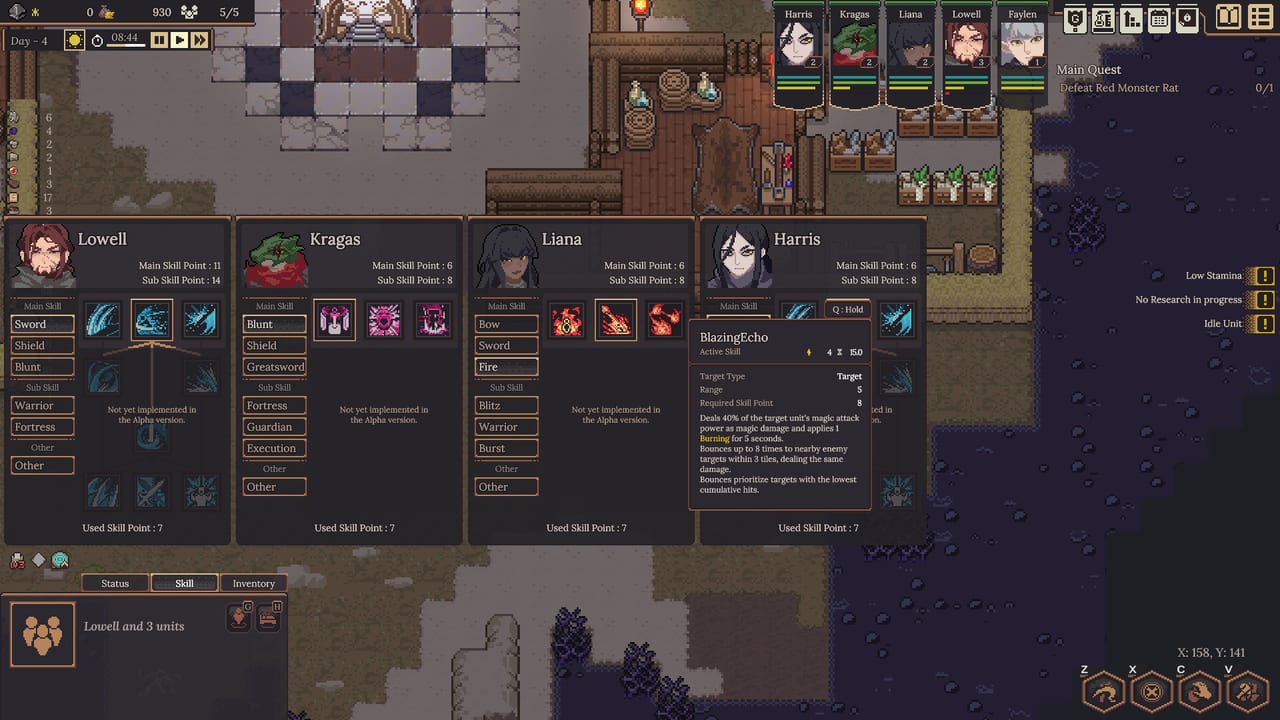
A Dungeon Settlers party has four slots and permadeath. Every slot decision is a commitment for twelve levels. This guide covers the logic of composition — read it with weapons, races, and combat so the numbers have a context.
The four slots are not healer, tank, DPS, support
There is no dedicated healer. The four slots are roles you fill from the available talent pools and racial aptitudes:
- Slot 1 — Guard. Holds chokepoints, uses provoke, soaks hits. Needs Constitution, shield aptitude. Lizardmen are the default choice (shield, greatsword, blunt racial). A guard without a shield is a body in front, not a wall.
- Slot 2 — Primary striker. Physical damage. Sword, greatsword, or blunt tree. Needs Strength and either Agility (greatsword) or both. Humans and Lizardmen fit here.
- Slot 3 — Ranged damage. Bow or caster. Elves get bow aptitude; Humans get fire aptitude. Bow is safer (ammo required); caster is higher energy (Willpower required).
- Slot 4 — Utility or second caster. Fill based on what slots 1–3 cannot cover. Water summons (scales with Intelligence) add bodies. Nature supports Elf kitchens. A second striker works if you skipped a caster.
Composition examples
Standard balanced (rank 2+):
- Lizardman guard (Constitution, shield)
- Human sword (Strength, sword aptitude)
- Elf bow (Agility, Perception, bow aptitude)
- Human fire or water caster (Intelligence, Willpower)
Kitchen notes: Elf needs vegetarian; Lizardman needs carnivore; Humans eat both. Two cook lines or pick one race.
No Elf yet (rank 1):
- Lizardman guard
- Human sword
- Human bow
- Human caster or Lizardman blunt striker
This party has no dietary restrictions. It is slower to research but easier to feed.
** caster-heavy (high Willpower):**
- Human guard (no shield racial, but Constitution works)
- Human sword
- Human fire caster
- Human water caster or nature support
Glass cannon. Needs excellent mood and good equipment. Possible on Easy combat; dangerous on Hard.
Race synergy math
Human +15% XP is a long-term bonus. Lizardman mining and taming helps the settlement more than the party. Elf research and bow is the best single-tree for a support slot.
Races do not stack cleanly. A party of four Humans is boring but consistent. A party of four Lizardmen is a mining crew that fights well. A party of four Elves is a research machine that needs meat-free food.
Inscriptions that change slots
Gloom (+20% all stats, Mood –3) on a guard in a good settlement is a carry. On a dirt-sleeper, it starts a death spiral.
Perfection (all talents +1 tier) is worth the gold on any candidate who will see twelve levels.
See traits and inscriptions before you lock a Rare on a role you did not plan.
When to bench a slot
A settler at zero mood is a Mental Break risk. A Mental Break mid-dungeon is a party wipe risk. If average mood is negative and the next run is deep, leave the unhappy settler at camp and hire a temporary replacement.
Same logic for low durability equipment. A 5% shield is no shield.
The guard problem
Most players undervalue the guard slot until they meet the Red Monster Rat. 144 physical attack goes through cloth. A Lizardman with a shield and Constitution is not a flavor pick — it is the only answer the game gives you for named elites.
Invest in the guard first. The striker gets the glory; the guard gets everyone home.
Frequently Asked Questions
Quick answers to the most common questions.
Can I run a party without a shield-user?
On Easy combat, yes. On Normal or Hard, the guard slot is non-negotiable for elite fights.
What if I have no Lizardman for a guard?
Any Constitution-talented settler with a shield works. Lizardman is optimal, not mandatory.
Should I match food diets when building a party?
Yes, or plan for two cook lines. Mixed diet parties need more settlement infrastructure.
When is a four-caster party viable?
Only on Easy combat difficulty with high Willpower and good mood infrastructure. High risk otherwise.